

Increase the page speed of your Webflow website with 5 easy steps
Slow loading times of a website not only lead to frustration for your site visitors, but also to a poor ranking on search engines such as Google and Bing. We've put together 5 steps on how to increase the page speed of your Webflow website.
Why is page speed important?
When people search for important information on the Internet, it is important for Google and Co. to quickly and precisely display the appropriate content. If the content of a website matches the search query, the associated link is displayed in the search results.
If a user now clicks on the link, but the page loads too slowly, it is very likely that the user will leave the page quickly. This so-called Bounce rate is increasing even more with mobile devices, such as tablets or smartphones. On the one hand, a high bounce rate is bad, as users who have left a page once will probably never come back, and on the other hand, a high bounce rate worsens the ranking of a website on Google.
Search engine crawlers crawl slow pages less frequently, which results in a less relevant ranking of a website's content in search results. For this reason, and in order not to annoy users and to offer an optimized user experience, page speed is an important factor for the success of a website.
How can I increase the page speed of my Webflow website?
Attention: these tips are aimed exclusively at users of the Webflow CMS. If you use other CMS, such as WordPress, some of the tips can be complicated to implement.
Webflow inherently offers impressive website performance. However, people who are not familiar with the principles of page speed can make significant mistakes and thus have a negative influence on their own website. Especially with internal teams that manage their own corporate website themselves, we often observe the following mistakes:
- High-resolution images are used
- There is no unique CSS naming system; this results in a huge mess of classes
- It uses a lot of animations that are not optimized
- Many external scripts (so-called third party scripts) are used
- HTML, CSS & JS are not played in compressed form
- etcetera
But all of these errors are easy to fix with Webflow. The following is a list of our top 10 tips that are guaranteed to positively influence your page speed:
1. Compress your images
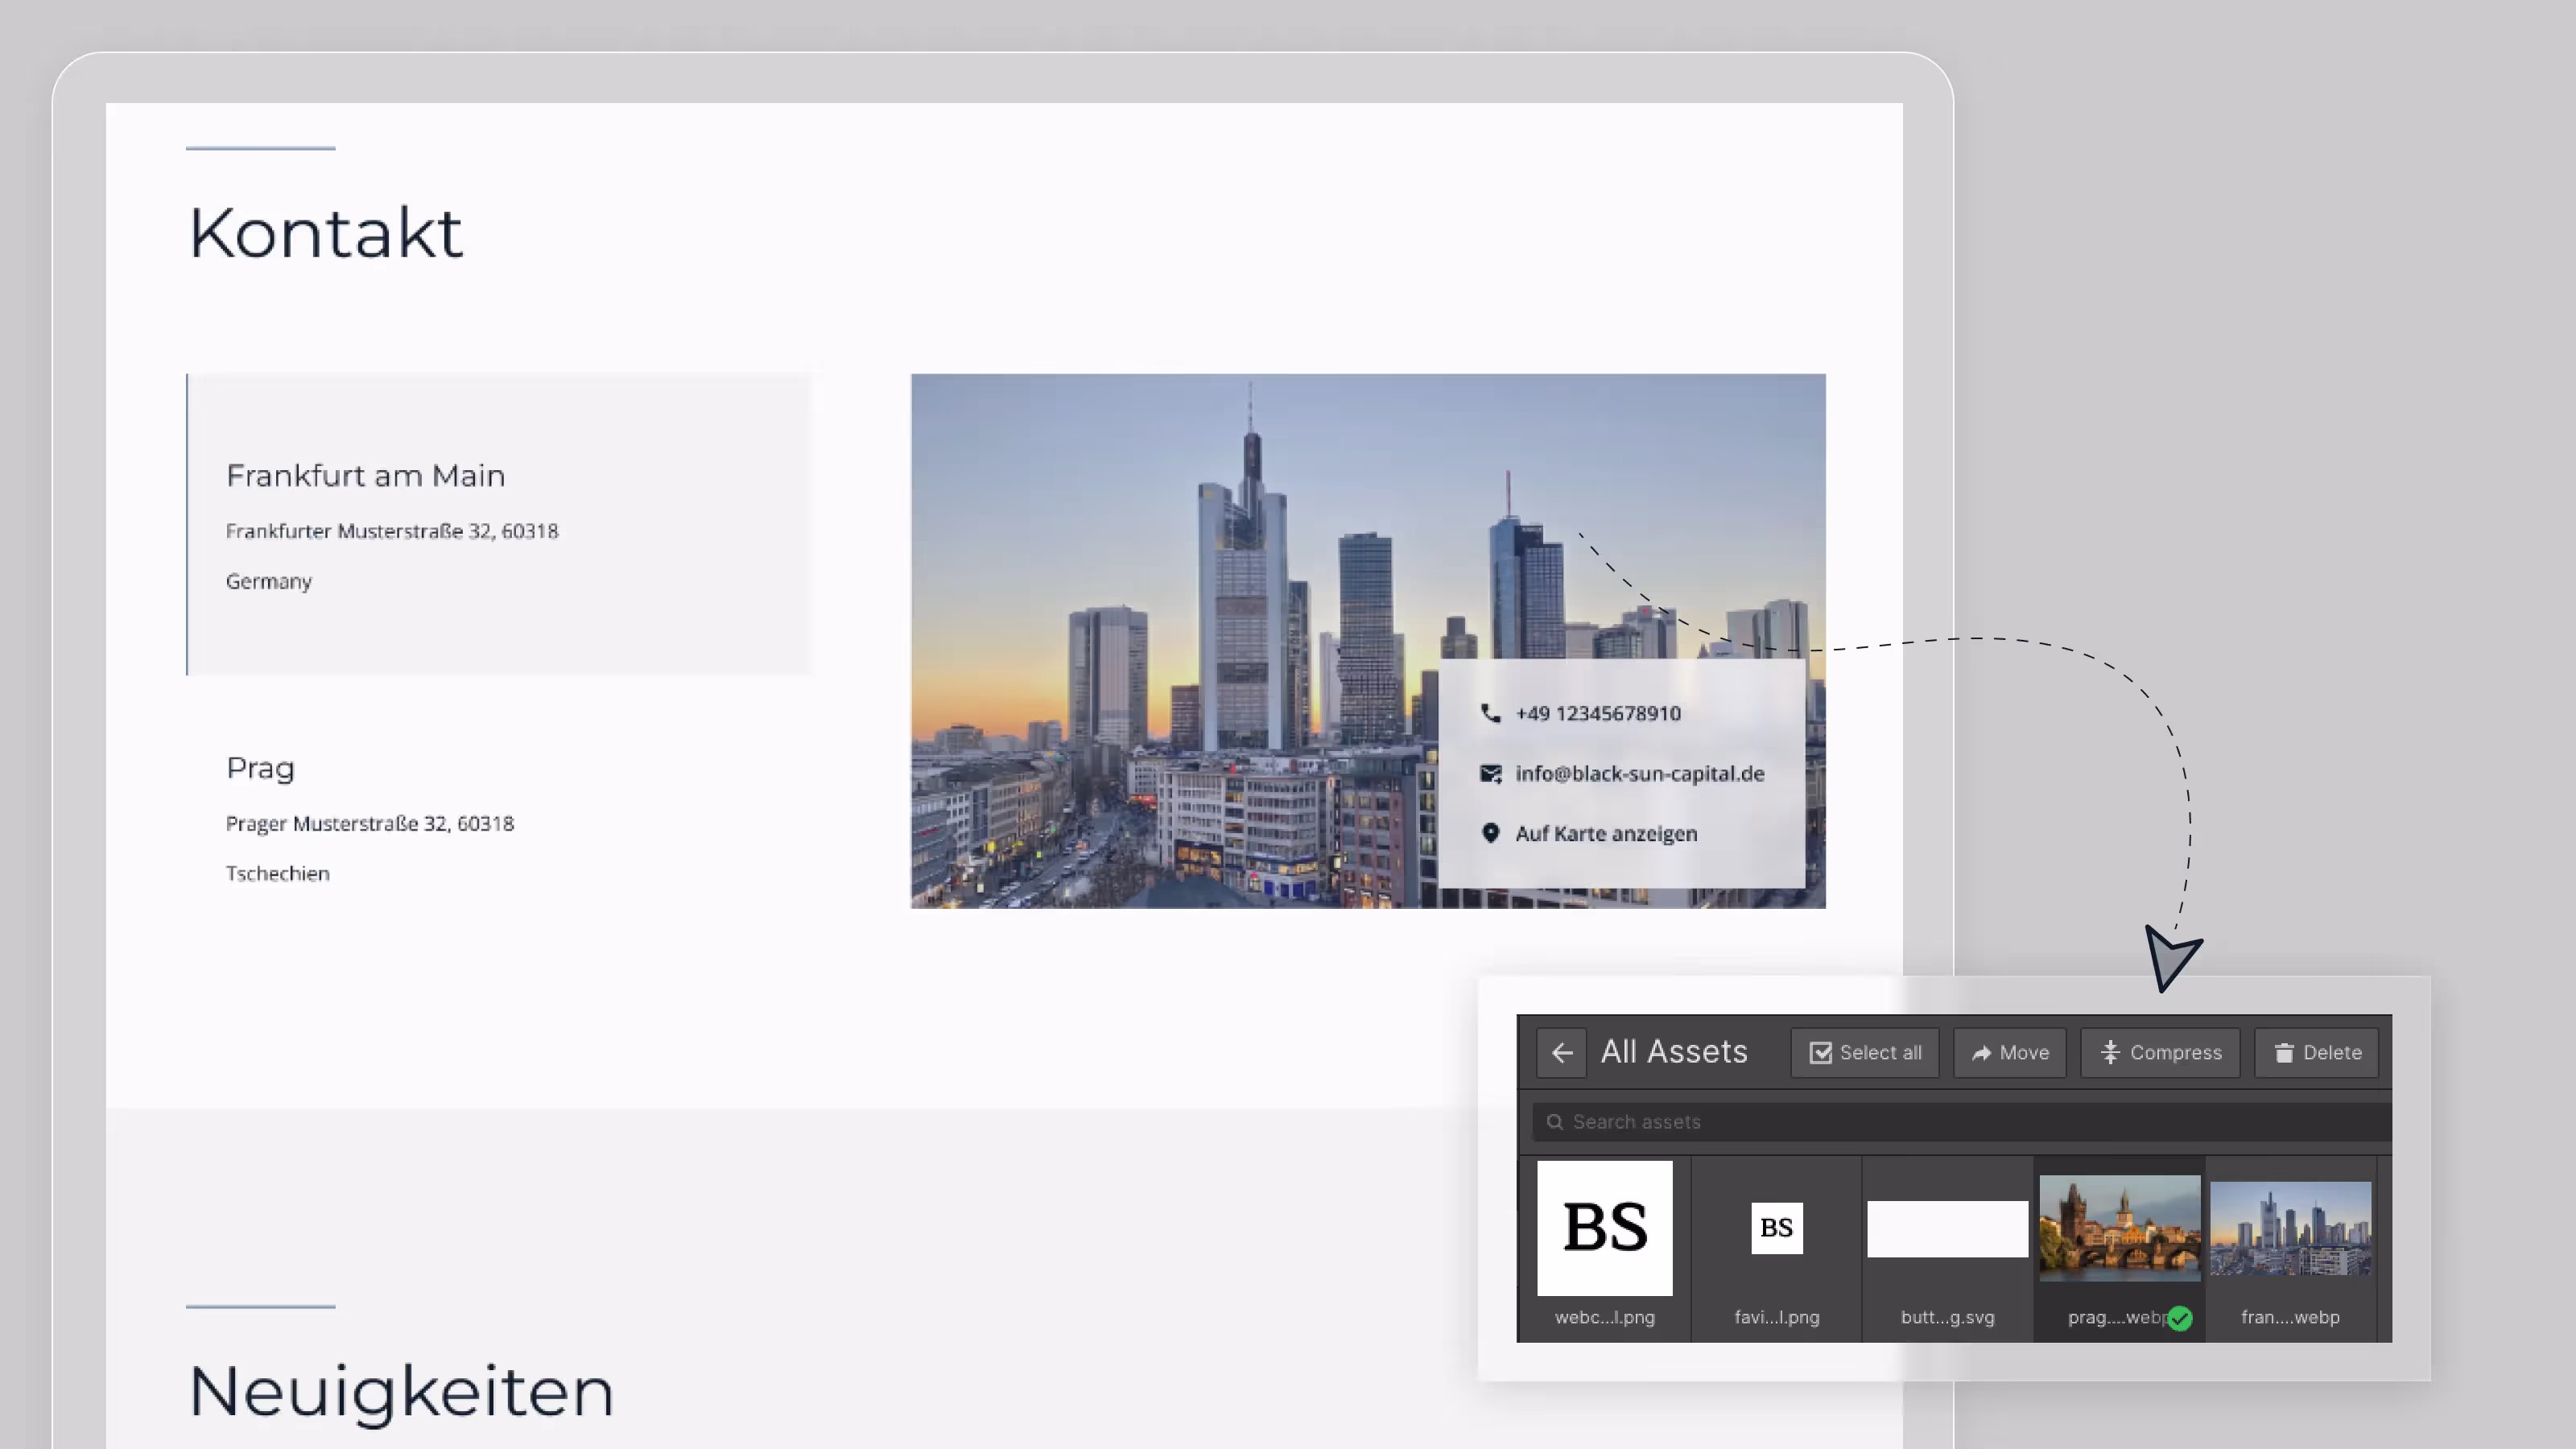
The images used on your website offer one of the biggest levers. Make sure all images are compressed before uploading. This applies to JPGs, PNGs as well as SVGs. If you are unable to compress images yourself, you will find a variety of providers on the Internet who will do this for you directly in your browser. In general, try to use as few images as possible. If you use images, vector graphics (so-called SVGs) are best. Basically, images should be as small as possible, a good rule of thumb is < 200kb.
Pro tip from the VE team: You can also compress images directly in Webflow to the super-modern WebP format. Here, simply select the image in the asset panel and click Compress in the bar above.
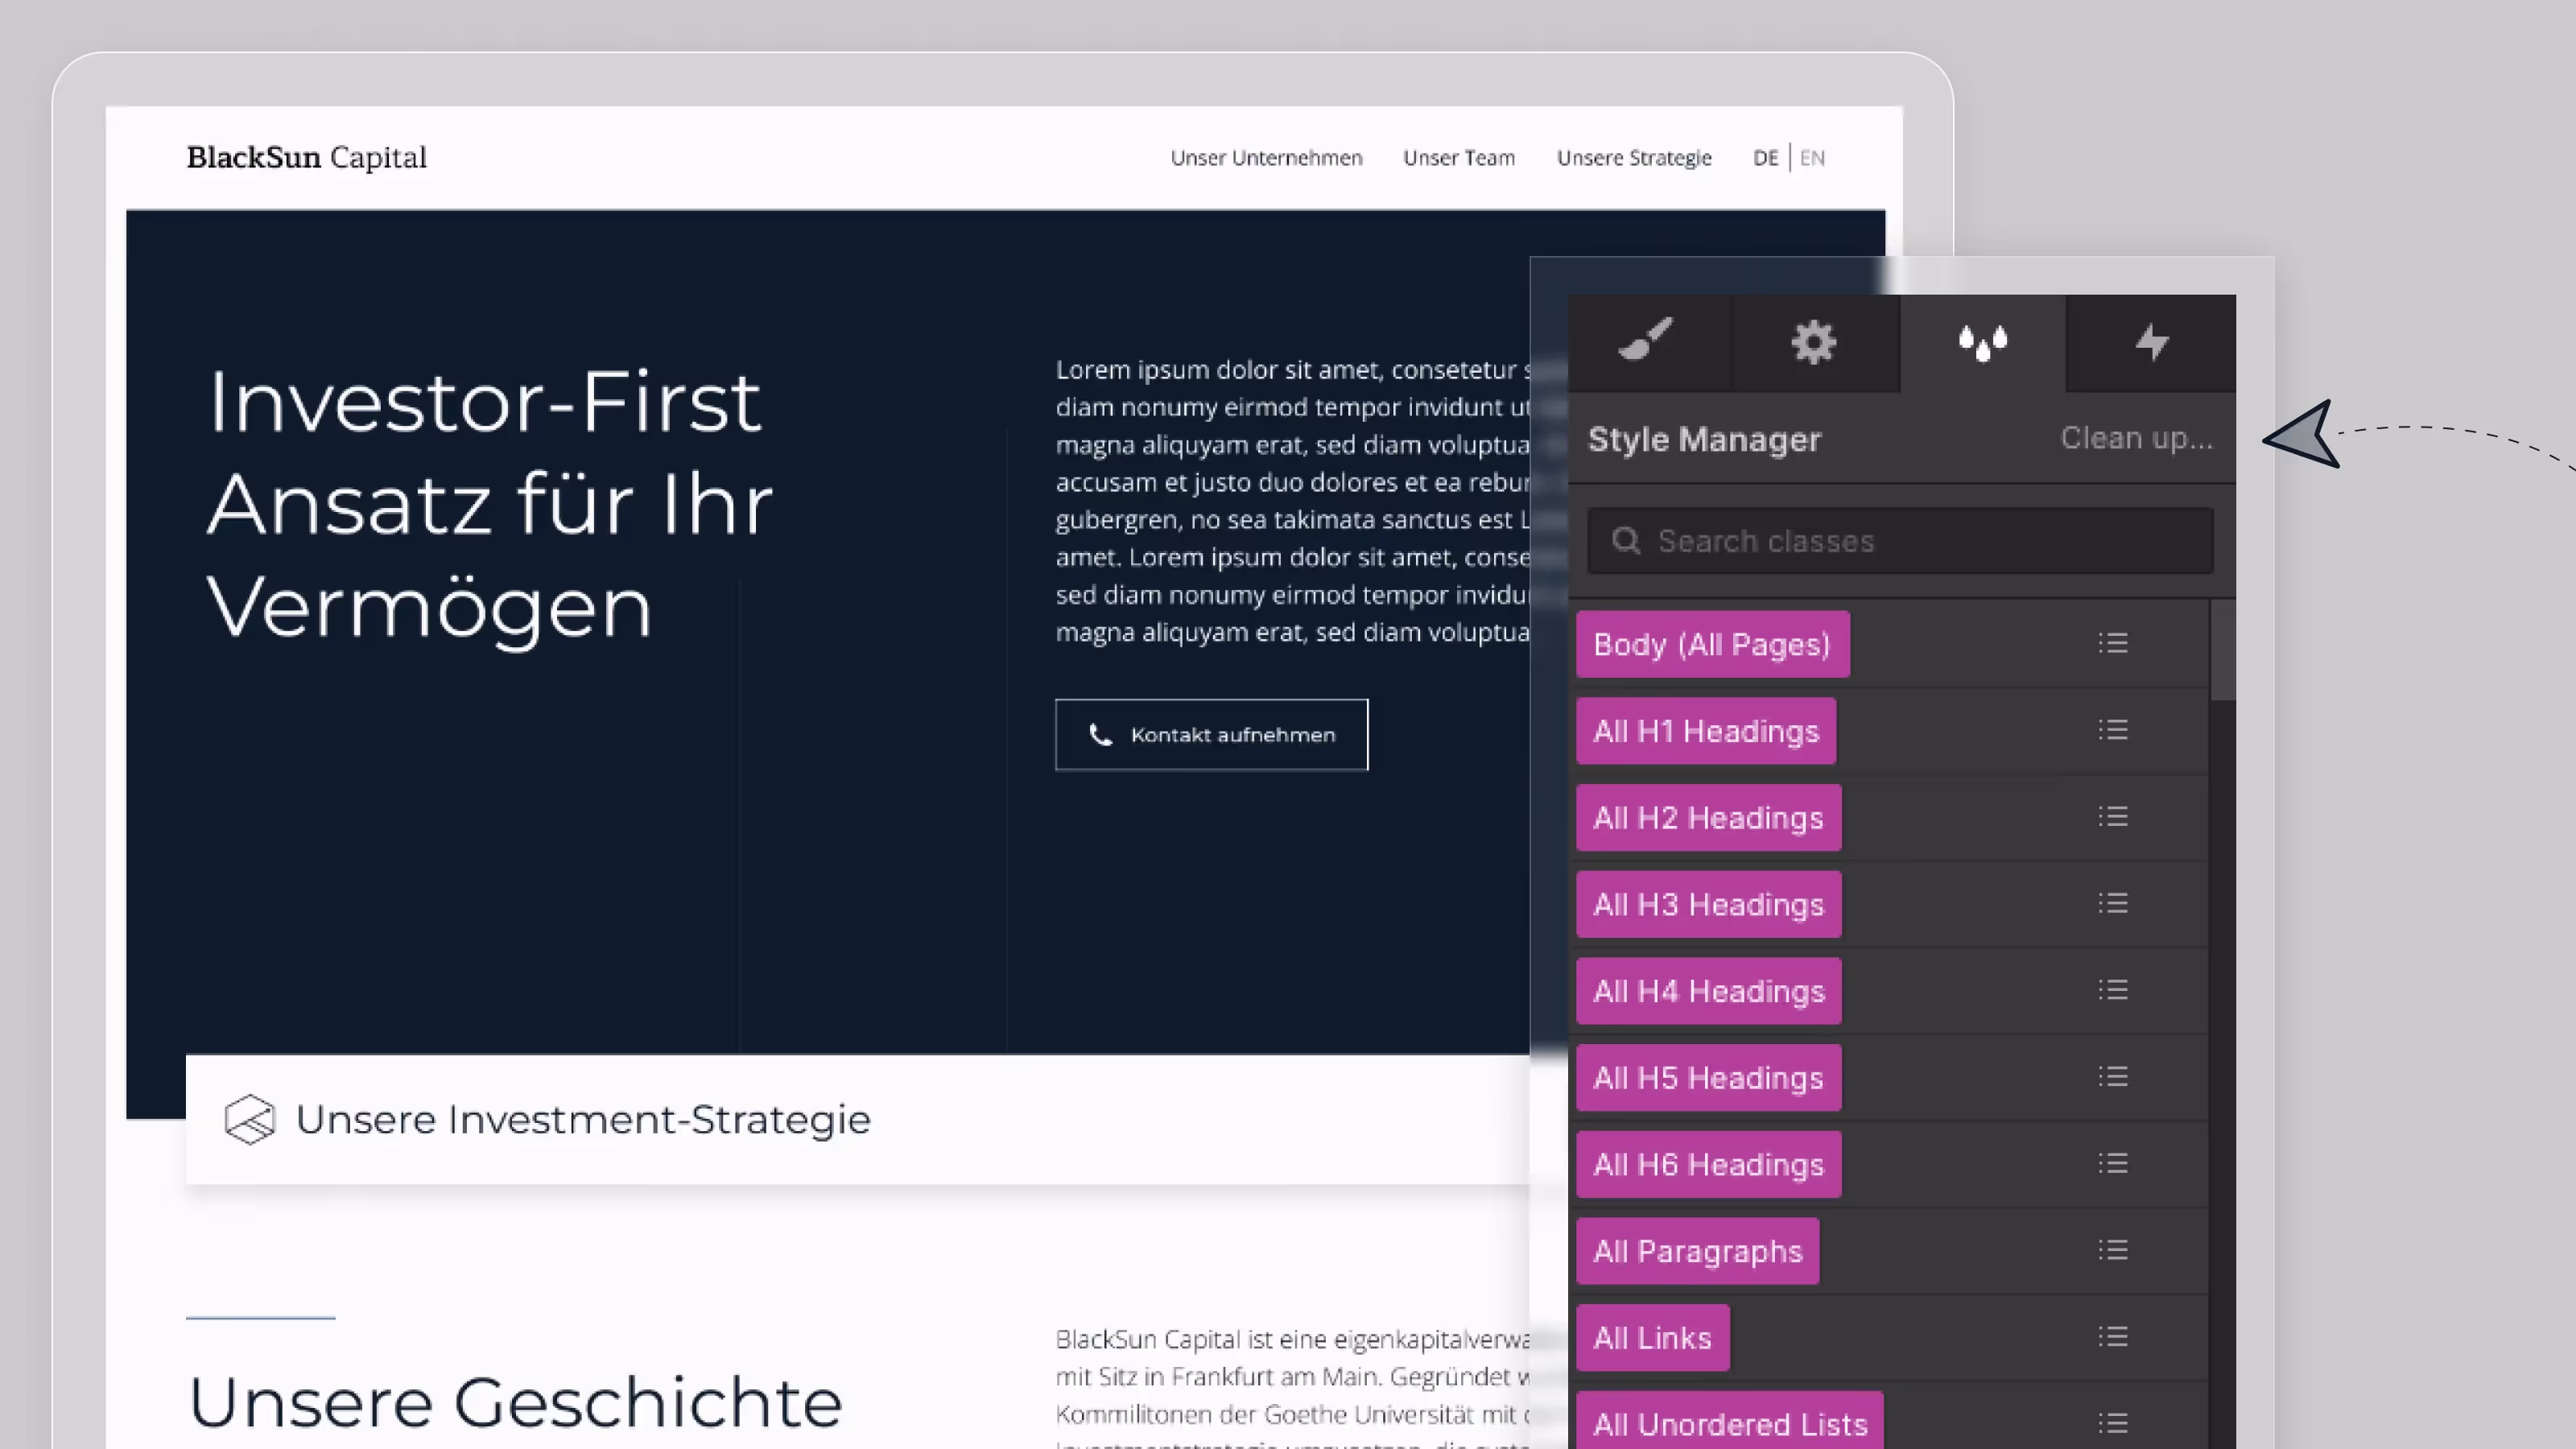
2. Clean up your CSS classes
Most projects that have issues with page speed don't have a clear CSS naming system. In other words, a defined set of CSS classes that keep the CSS clear and small. This creates a large CSS file, which must first be loaded when you visit your website. One problem: CSS classes that are no longer used at all are also stored here and further expand the scope.
To avoid exactly that, you can use the Style Manager (the three “drops” in the top right corner of the Webflow Designer) to eliminate all CSS classes that are no longer being used. To do this, simply click on “Clean Up.”
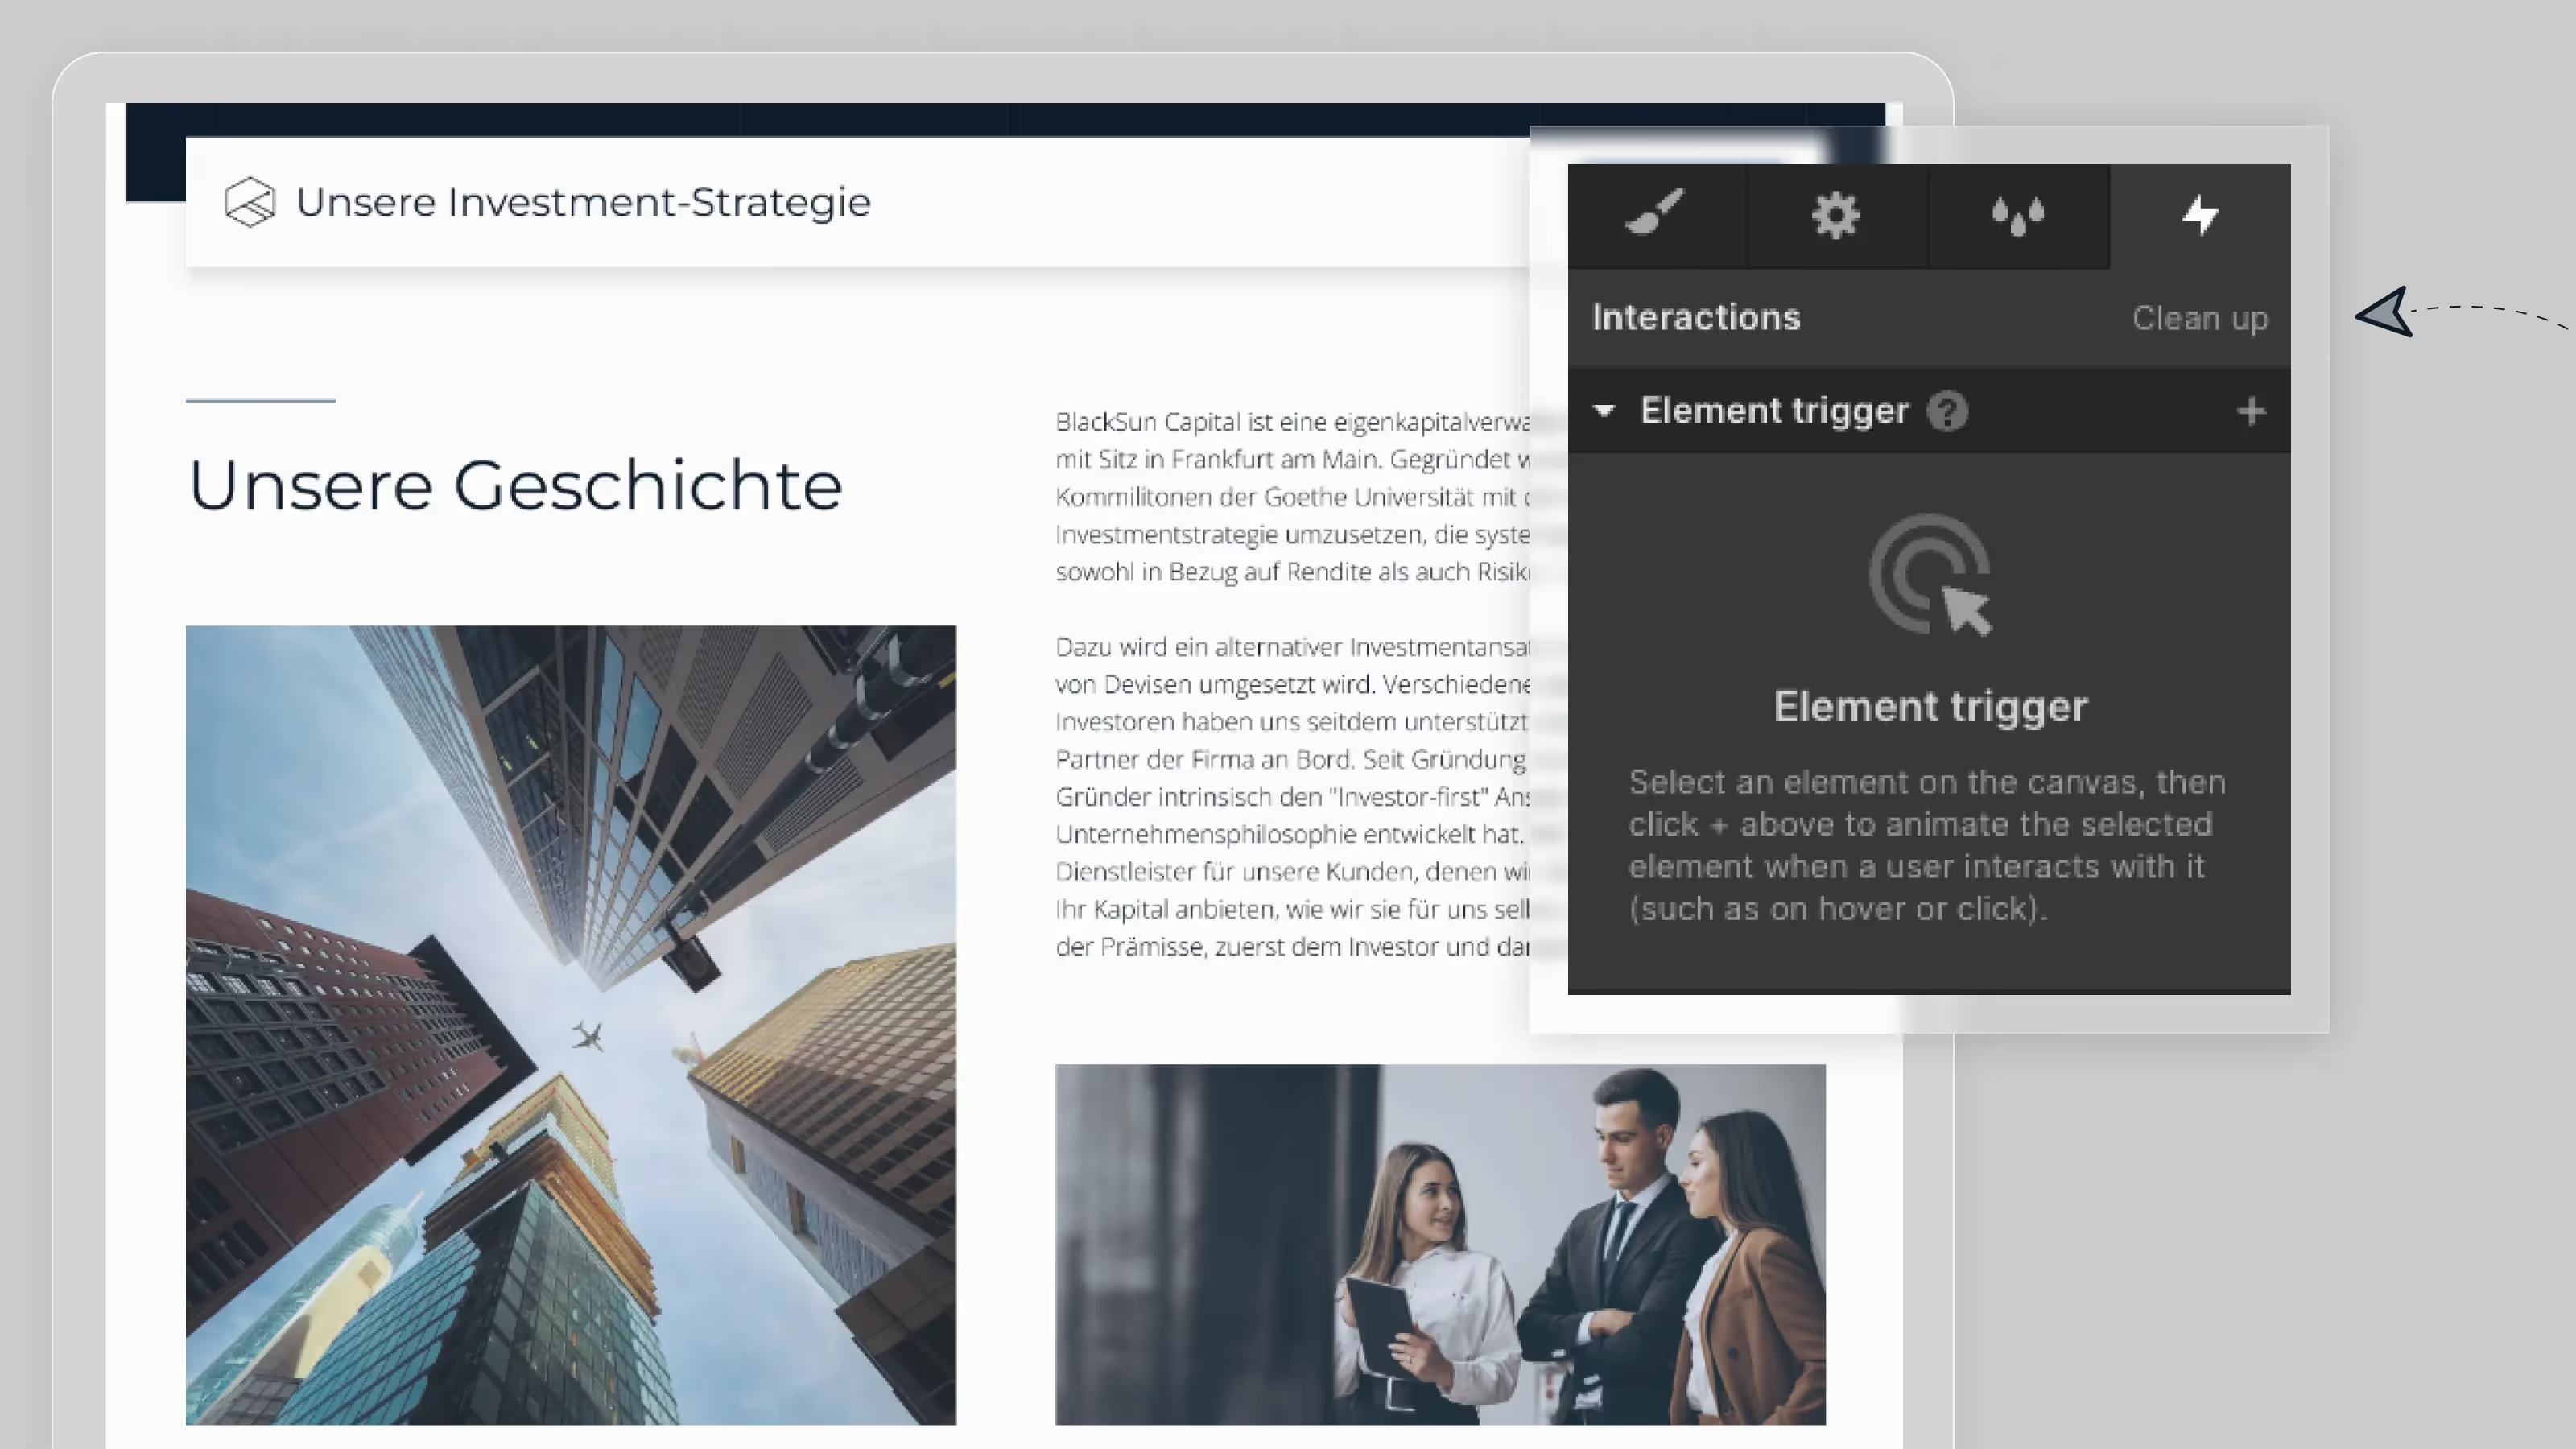
3. Delete old animations
Similar to the CSS cleanup process, Webflow also gives you the option to delete old animations. To do this, jump into the Interactions Panel (the “flash” at the top right of the Webflow Designer) and click on “Clean Up.” In the following notification, you will be summarized again which animations will be deleted.
4. Avoid third party scripts
Most websites come to a limit at some point where they want features that aren't available natively. Examples include integration of social media posts, calendar integrations, tracking of visits, and more. All of these integrations must be loaded from other servers when the page loads and therefore damage your page speed. Our recommendation is therefore always to refrain from using third-party scripts. Since this is not always possible, at least all scripts that are not being actively used should be removed.
5. Compress your HTML, CSS, and JavaScript
Another quick and easy step for your page speed is to minimize your HTML, CSS, and JavaScript code. From all 3 code blocks, a browser can display your final Webflow website. However, a browser is not a person and can do without the readability of the code. For this reason, Webflow offers the option to compress the code of your page in Page Settings/Publishing. This makes the code harder to read (for humans, mind you), but it also loads faster.

We hope that the tips will help you increase your page speed quickly and refreshingly easily. If you want to go even deeper into the subject matter, we recommend: Webflow Page Speed Guide for Advanced Users.